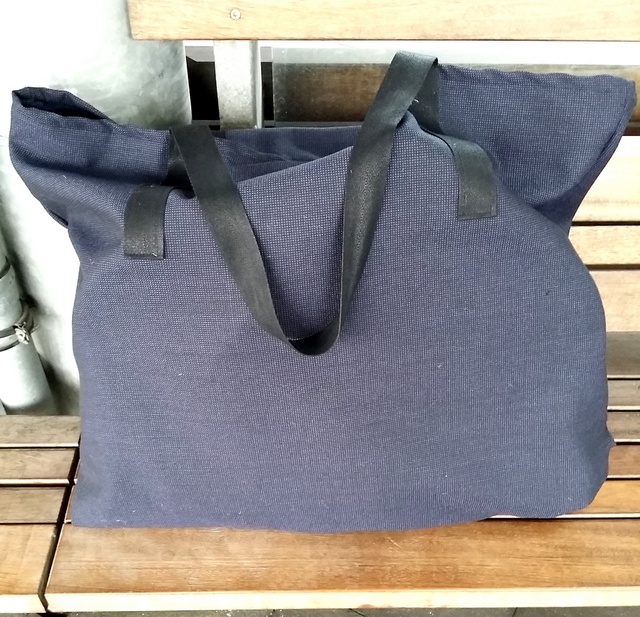
I tirsdags havde jeg 3 ompolstrede sæder, som jeg skulle have med hjem fra Teknisk skole. Desværre var den taske jeg havde med ikke stor nok, så måtte jeg i gang med at lave en taske selv. De færdige mål på min taske er 80×60 cm.
Stoffet jeg har brugt er møbelstof, mener at det jeg brugte er syntetisk. Hvis du skal lave tasken, så sørg for at lave den i noget kraftigt stof, især hvis du skal lave en så stor taske som jeg.
Materialer:
- kraftigt stof (evt. møbelstof)
- ca 2,5 m kraftigt bånd (gjord)
- symaskine
- sytråd tykkelse 50
Last Tuesday I had 3 reupholstered seats I needed to carry home. Unfortunately, the bag I brought with me was too small for the task. Therefore I had to make a new bag I could carry all 3 seats in. The measurements on my bag are 80×60 cm.
The fabric I have used for this project is fabric for furniture and I think it’s synthetic (It feels that way) Just make sure that the fabric you use is heavy fabric. Especially if you plan to make a large bag.
Materials:
- Heavy fabric
- 2,5 metres of webbing
- sewing machine
- sewing thread (thickness 50)
Læg stoffet ud med retsiden op. Fold derefter stoffet som vist på billedet.
De to sider syes sammen med 2 cm mellemrum. Derefter overlockes eller zigzagges de to sider så stoffet ikke trevler.
Place the fabric with the right side up. Fold the fabric as shown on the picture above. Sew the two edges with a seam allowance on 2 cm. Overlock or zigzag the two edges.
Du har nu en åben pose. Lav et dobbelt ombuk på 2 cm hele vejen rundt i posens åbning . Sy ca 1,5 cm fra kanten.
The bag should have a opening like shown above. Fold the edges 2 times 2cm all the way around in the opening.
Derefter sættes hanken på. Jeg har brugt syntetiske gjorde (man bruger dem inden for møbelpolstrer verdenen) Alternativt kan man bruge sikkerhedssele, eller kraftig bånd. jeg har brugt ca 2x125cm bånd i alt.
Sørg for at hanken ikke snor sig når den sættes på. Fold de de yderste 2 cm bag om hanken så de ikke flosser. Jeg har valgt at sætte hankene 10 cm fra kanten af tasken, da det gav det pæneste resultat på min taske.
Sy hankene fast med 0,5 cm mellemrum. Pas på du ikke syr de to sider af tasken fast når du syr hankene på.
Now it is time for the straps on the bag. I have used around 2.5 (2×1.25) metres of synthetic webbing. Be careful not to twist the webbing when you attach it to the bag with needles. Place the webbing 10 cm from the sides og the bag. Fold back the two edges of the webbing and sew on the straps with at seam allowance of 0.5 cm. Be carefull not to sew the two sides of the bag together.

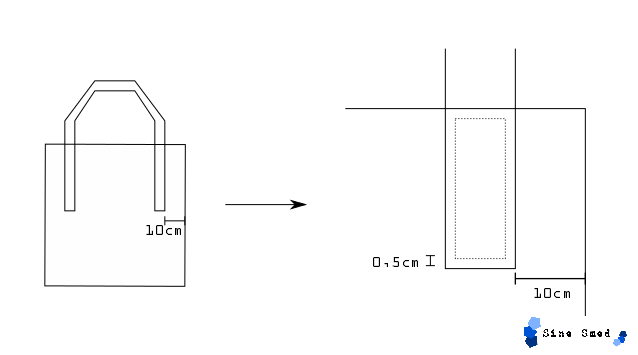
Til sidst laves taskens bund; vend vrangen ud. Tag hjørnerne og læg syningen fladt ned så den er i midten, som vist på billedet. Afmål 10 cm (eller hvad du foretrækker) fra spids og ind mod midten. Hæft fast med nåle, sy tværs henover spidsen, som det er vist med den stiplede linje. gentag for den anden spids. Klip det overskydende stof af ca 2 cm fra syningen. Det kan anbefales at overlocke/zigzagge der hvor du har klippet.
Vend retsiden ud, og tasken er klar til brug.
The final step is to make the bottom of the bag. Turn the inside out (wrong side out). Place the corner of the bottom as shown on the picture above. measure 10 cm from the tip towards the middle. Sew across the triangle (see the dashed line). Cut off the excess fabric 2 cm from the sewing. I would recomend that you overlock/zigzag the edges in the bottom.
Turn the right side out and the bag is ready for use.
God weekend
Have a nice weekend
 Til sidst laves taskens bund; vend vrangen ud. Tag hjørnerne og læg syningen fladt ned så den er i midten, som vist på billedet. Afmål 10 cm (eller hvad du foretrækker) fra spids og ind mod midten. Hæft fast med nåle, sy tværs henover spidsen, som det er vist med den stiplede linje. gentag for den anden spids. Klip det overskydende stof af ca 2 cm fra syningen. Det kan anbefales at overlocke/zigzagge der hvor du har klippet.


